User Guide
Overview
This guide covers how to send email blasts with pickup response buttons and how to monitor customer responses.
Last Updated: February 2026 Duration: 20 minutes Audience: CSRs, Dispatchers, Managers
Lesson 1: Sending Email Blasts
Learning Objectives
- Create a mass email with pickup response buttons
- Use saved filters to target specific customers
- Understand what happens when customers respond
Step-by-Step: Create a Pickup Email Blast
Navigation: Email Marketing → Mass Email from Filter
Click Mass Email from Filter in the top menu bar to open the dialog:
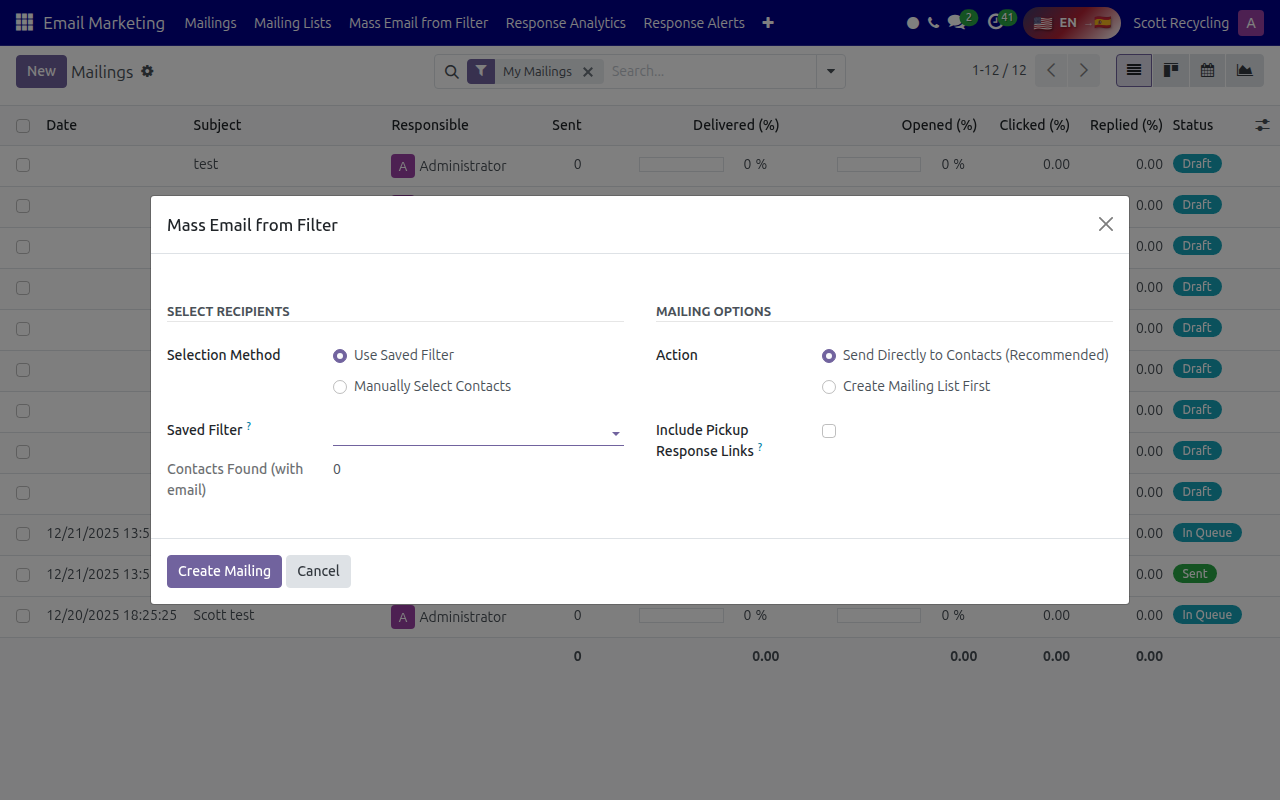
The dialog has two sections: Select Recipients (left) and Mailing Options (right).
Step 1: Select Your Recipients
You have two options:
| Method | When to Use |
|---|---|
| Use Saved Filter | When you have a pre-defined customer segment (e.g., "Active Recycling Customers") |
| Manually Select Contacts | When targeting specific customers |
Using a Saved Filter:
- Set Selection Method to "Use Saved Filter"
- Click the Saved Filter dropdown
- Select your filter (e.g., "Recycling - Due for Contact")
- The Number of Contacts will update automatically
Manually Selecting Contacts:
- Set Selection Method to "Manually Select Contacts"
- Click in the Contacts field
- Search and select customers
- Use Shift+Click to select multiple
Step 2: Enable Pickup Response Links
- Check the box "Include Pickup Response Links"
- An info box will appear confirming the feature is enabled
What This Does
When enabled, each customer receives a personalized email with unique tracking links. The system generates a secure token for each recipient.
Step 3: Set Email Subject
- Enter a subject line in Email Subject
- Keep it clear and action-oriented
Good Examples:
- "Do You Have Materials Ready for Pickup?"
- "Quick Check-In from Scott Recycling"
- "Ready for Your Next Recycling Pickup?"
Avoid:
- Vague subjects like "Hello" or "Update"
- ALL CAPS or excessive punctuation
Step 4: Create the Mailing
- Click Create Pickup Mailing
- Wait for confirmation message: "X pickup response tokens generated"
- You'll be redirected to the mailing editor
Step 5: Review and Send
- Review the email content (pre-filled with pickup buttons)
- Optionally customize the message above the buttons
- Click Send when ready
- Confirm the send action
The Email Your Customers Receive
Customers will see a professional email with:
- Personalized greeting with their company name
- Brief message asking about pickup needs
- Two prominent buttons:
- Green "Yes, I Need a Pickup" button
- Gray "No, Not Right Now" button
- Scott Recycling footer with contact info
Lesson 2: What Happens When Customers Respond
"Need Pickup" Response
When a customer clicks "Yes, I Need a Pickup":
| Action | Result |
|---|---|
| Lead Created/Updated | Lead moves to "Needs Pickup" stage |
| Note Created | "Customer requested pickup via email link" logged |
| last_decision_maker_date | Updated to today |
| Response Record | Marked as "need_pickup" with timestamp |
What This Means:
- The lead appears in the dispatcher's queue
- Customer is flagged for pickup scheduling
- The contact shows as recently engaged
"No Pickup" Response
When a customer clicks "No, Not Right Now":
| Action | Result |
|---|---|
| NO Lead Created | Customer stays in regular cycle |
| Note Created | "Customer indicated no pickup needed via email link" logged |
| last_decision_maker_date | Updated to today |
| Response Record | Marked as "no_pickup" with timestamp |
What This Means:
- Customer won't re-enter the call queue until their next followup date
- Followup cycle resets: next contact = today + their followup frequency
- No dispatcher action needed
Customer Confirmation Page
After clicking, customers see a confirmation page:
For "Need Pickup":
- Green checkmark icon
- "Pickup Request Received!" heading
- "We'll be in touch soon" message
- Their company name displayed
For "No Pickup":
- Thumbs up icon
- "Got It!" heading
- "We'll check back with you later" message
- Their company name displayed
Lesson 3: Monitoring Responses
Viewing All Responses
Navigation: Email Marketing → Response Analytics
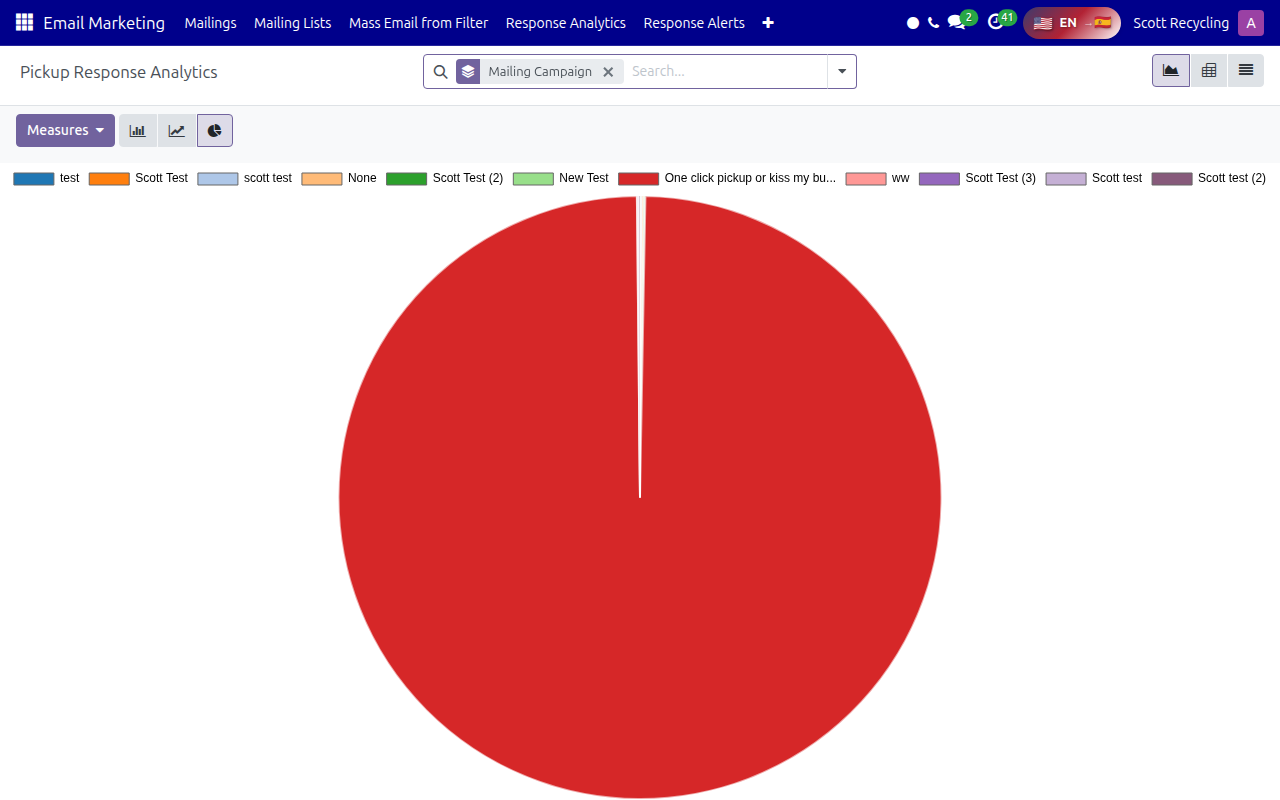
You can also access responses via SR Management → Customers → Email Responses.
This dashboard shows all pickup email responses:
| Column | Description |
|---|---|
| Partner | Customer name (clickable) |
| Response Type | need_pickup, no_pickup, or pending |
| Response Date | When they clicked |
| Mailing | Which email campaign (if tracked) |
| Lead | Link to created lead (if applicable) |
| Note | Link to activity note |
Filtering Responses
Use the built-in filters:
| Filter | Shows |
|---|---|
| Need Pickup | Customers who requested pickups |
| No Pickup | Customers who declined |
| Pending | Tokens generated but not yet clicked |
| Today | Responses from today |
| This Week | Responses from this week |
Using the Pivot View
For reporting:
- Click the Pivot icon in the view switcher
- Group by Response Type to see totals
- Add date grouping for trends
Lesson 4: Best Practices
When to Send Pickup Emails
Good Times:
- Beginning of the week (Monday/Tuesday)
- After holidays when businesses are catching up
- Seasonally when recycling volumes typically increase
Avoid:
- Friday afternoons (low response rates)
- During major holidays
- Too frequently (respect customer preferences)
Targeting the Right Customers
Recommended Filters:
| Filter Name | Description |
|---|---|
| Active Recycling Customers | Customers with recent pickups |
| Due for Contact | Based on followup frequency |
| High-Volume Accounts | Priority customers |
Avoid Sending To:
- Customers with recent pickups (< 7 days)
- Customers currently in the call queue
- Customers with do-not-email preferences
Following Up on Responses
For "Need Pickup" Responses:
- Dispatcher should contact within 24 hours
- Reference that they responded to the email
- Schedule the pickup promptly
For "No Pickup" Responses:
- No immediate action needed
- Customer will re-enter queue per their followup frequency
- Track patterns if customer consistently declines
Lesson 5: Troubleshooting
Customer Says They Didn't Receive Email
- Check their email address in Contacts
- Look for the response in Email Responses (maybe they did click)
- Check the mailing's statistics for bounces
- Have them check spam/junk folder
Link Not Working for Customer
- Verify the token exists in Email Responses
- Check if they already responded (can only respond once)
- Ensure Odoo is accessible from the internet
- Check server logs for errors
Response Not Creating Lead
- Check the Email Responses record - does it show lead_id?
- Look at the Odoo log for errors during processing
- Verify the customer has valid partner record
- Contact IT if issue persists
The Email Marketing Screen
When you open Email Marketing, you'll see all your mailings with their status, delivery stats, and open/click rates:
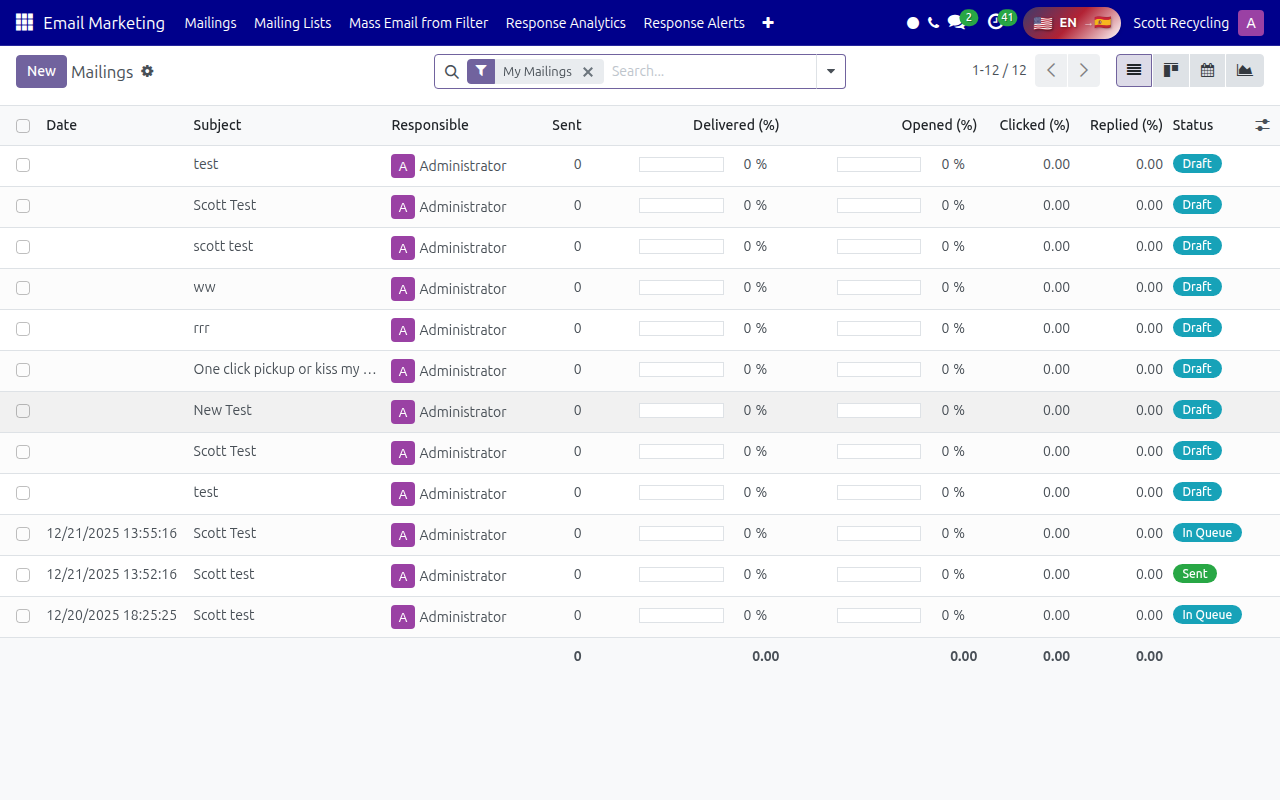
The top menu provides access to Mailings, Mailing Lists, Mass Email from Filter, Response Analytics, and Response Alerts.
Quick Reference
Sending Email Checklist
- Select recipients (filter or manual)
- Check "Include Pickup Response Links"
- Enter clear subject line
- Click "Create Pickup Mailing"
- Review email content
- Send mailing
Response Monitoring Checklist
- Check Email Responses dashboard daily
- Filter by "Need Pickup" for action items
- Ensure leads are being scheduled
- Review "No Pickup" trends weekly
Key Locations
| Task | Navigation |
|---|---|
| Create Email Blast | Email Marketing → Mass Email from Filter |
| View Responses | SR Management → Customers → Email Responses |
| Check Leads | SR Management → Leads |
| View Customer Notes | Contacts → [Customer] → Notes tab |
Questions? Contact your supervisor or IT support for assistance.