Social Media Management
Overview
The Social Media Management module (sr_social_media) is Scott Recycling's centralized platform for managing content across eight social media platforms. It combines AI-powered content generation, multi-level approval workflows, scheduled publishing, unified analytics, and a consolidated inbox -- all from within Odoo.
Supported platforms: Facebook, Instagram, LinkedIn, X (Twitter), YouTube, Google Business Profile, TikTok, and Pinterest.
Last Updated: February 2026 Target Audience: Marketing, Managers
Navigation
The Social Media menu contains the following sections:
| Menu Item | What It Shows |
|---|---|
| Approval Queue | Posts awaiting review and approval |
| Inbox | Messages and comments from all connected platforms |
| All Posts | Complete list of all posts across all statuses |
| Analytics | Performance dashboards with follower, reach, and engagement data |
| Calendar | Visual calendar of scheduled and published posts |
| Media Library | Uploaded images, videos, and other media assets |
| Configuration | Platform connections, locations, templates, and settings |
Accounts
Connecting a Social Account
Each social media platform requires an account connection via OAuth. To connect an account:
- Navigate to Social Media > Configuration > Accounts
- Click New
- Select the Platform (Facebook, Instagram, LinkedIn, etc.)
- Click Connect -- this opens the platform's OAuth authorization page
- Log in and grant Scott Recycling access
- The account status changes to Connected
Account Fields
| Field | Description |
|---|---|
| Platform | Which social network (Facebook, Instagram, LinkedIn, X, YouTube, GBP, TikTok, Pinterest) |
| Account Name | Display name for this account |
| Connection Status | Connected, Disconnected, or Expired |
| Followers | Current follower count (synced from platform) |
| Post Count | Total number of posts published through this account |
| Location | Associated business location (optional) |
| Last Synced | When the account data was last refreshed |
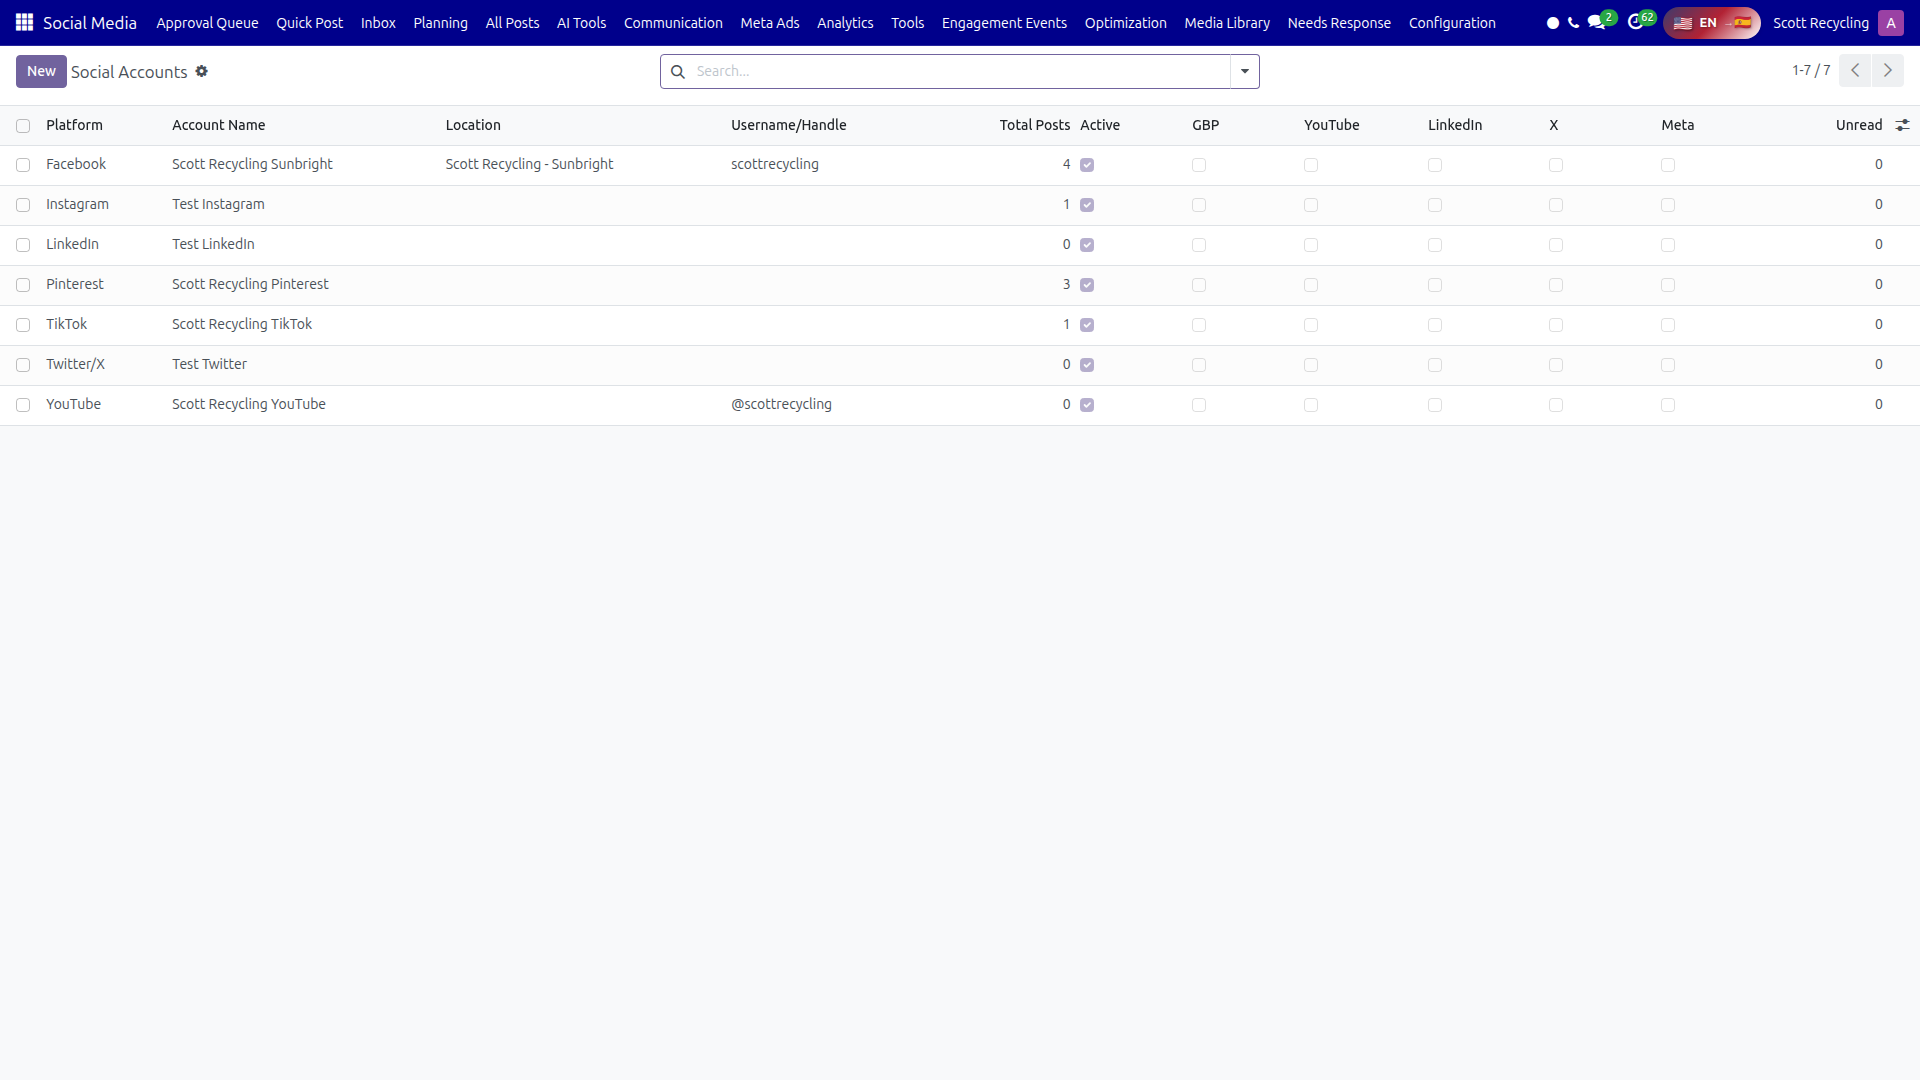 Social Media Accounts — connected platforms with follower counts and connection status
Reconnect expired accounts promptly
OAuth tokens expire periodically. If an account shows Expired status, reconnect it immediately to avoid missed scheduled posts.
Locations
Locations represent Scott Recycling business locations. They provide context for AI content generation and allow multi-location posting strategies.
| Field | Description |
|---|---|
| Name | Location name (e.g., "Scott Recycling - Pomona") |
| Address | Physical address |
| Social Accounts | Which social accounts are associated with this location |
| Active | Whether the location is available for content generation |
Navigate to Social Media > Configuration > Locations to manage locations.
Creating Posts
The Post Editor
To create a new post:
- Navigate to Social Media > All Posts
- Click New
- Fill in the post form:
| Field | Description |
|---|---|
| Content | The post text -- supports hashtags and mentions |
| Hashtags | Hashtag field for organizing and tracking |
| Media | Upload images or videos, or select from the Media Library |
| Accounts | Select one or more social accounts to publish to |
| Category | Content category for organization and analytics |
| Scheduled Date | When to publish (leave blank for manual publishing) |
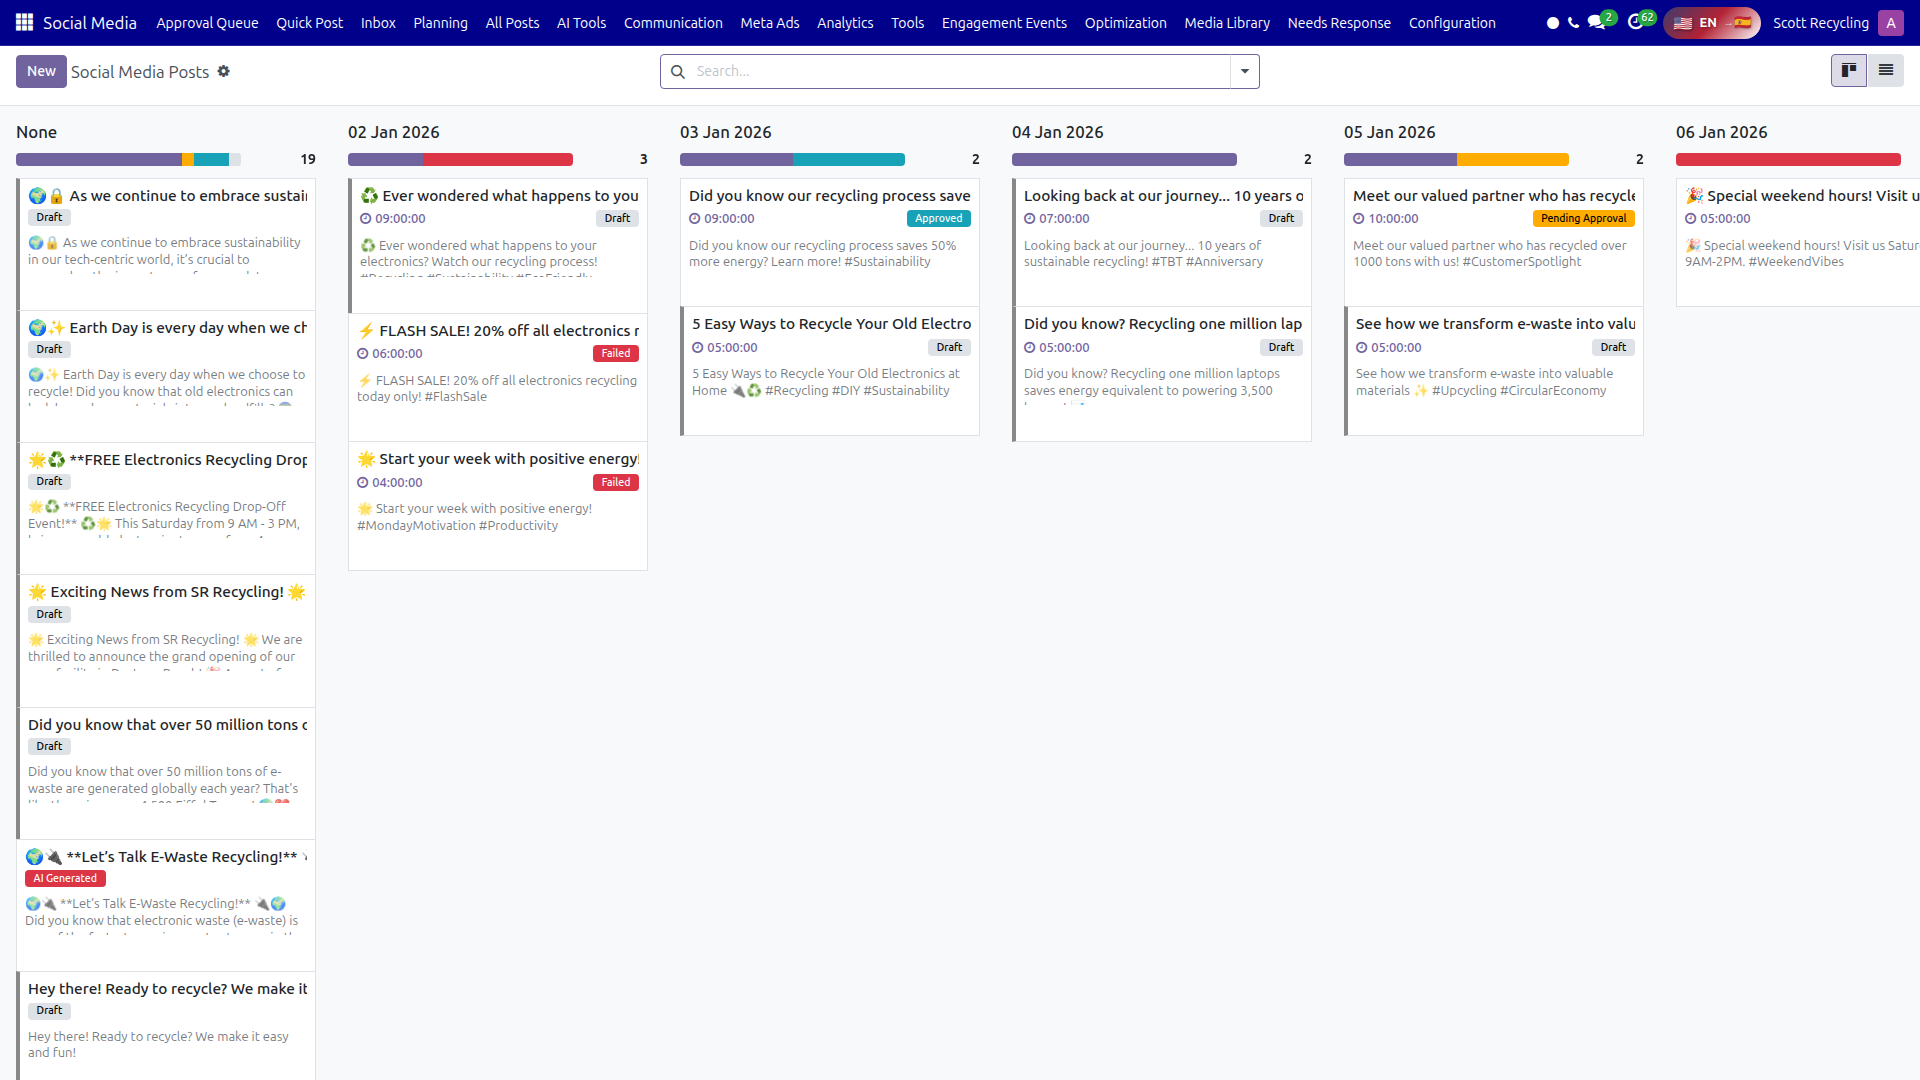 All Posts view — manage content across all platforms with status filtering
Post Categories
Posts are organized by content category:
| Category | Description |
|---|---|
| Educational | Tips about e-waste recycling, environmental facts, how-to guides |
| Impact | Metrics and stories about recycling impact and sustainability |
| Promotional | Service promotions, special offers, new capabilities |
| Behind the Scenes | Warehouse tours, employee spotlights, daily operations |
| Engagement | Questions, polls, community interaction posts |
| Event | Upcoming events, open houses, community drives |
AI Content Generation
The AI content generation feature uses prompt templates and location context to draft post content automatically.
Generating Content with AI
- Open a new or existing post
- Click Generate with AI
- The generation wizard opens:
| Field | Description |
|---|---|
| Template | Select a prompt template (filtered to Social category) |
| Location | Choose a business location for context |
| Variables | Fill in any template variables (topic, tone, platform, etc.) |
- Click Generate -- the AI creates draft content
- Review the generated text in the preview
- Click Use This Content to insert it into the post editor, or Regenerate for a new version
- Edit the content as needed before submitting
Treat AI content as a starting point
AI-generated content is a first draft. Always review and personalize it before submitting for approval. Add specific details, adjust the tone, and verify any claims or statistics.
Approval Workflow
Every post goes through an approval workflow before it can be published. This ensures content quality and brand consistency.
Post Status Workflow
| Status | Meaning |
|---|---|
| Draft | Post is being written, not yet submitted |
| AI Generated | Content was created by AI and needs human review |
| Pending Approval | Post has been submitted and is waiting for an approver |
| Approved | An approver has accepted the post -- ready to schedule or publish |
| Rejected | An approver has sent the post back with feedback |
| Scheduled | Post is approved and queued for automatic publishing at the scheduled date |
| Published | Post has been sent to the platform(s) |
Submitting for Approval
- Open a post in Draft or AI Generated status
- Review the content, media, and target accounts
- Click Submit for Approval
- The post moves to Pending Approval and appears in the Approval Queue
Approving or Rejecting a Post
- Navigate to Social Media > Approval Queue
- Open a post with Pending Approval status
- Review the content, media, and target platforms
- Click Approve to advance the post, or Reject to send it back with comments
- If rejecting, add feedback in the chatter explaining what needs to change
Content Calendar
The Content Calendar provides a visual overview of all posts by date across month, week, and day views.
Calendar Features
| Feature | Description |
|---|---|
| Month / Week / Day Views | Toggle between time scales using the view buttons |
| Color Coding | Posts are color-coded by status (draft, scheduled, published, etc.) |
| Drag-and-Drop Scheduling | Drag a post to a different date to reschedule it |
| Click to Create | Click an empty date to start a new post for that day |
| Filter by Account | Show only posts for specific social accounts |
Navigate to Social Media > Calendar to access the calendar view.
Publishing
Immediate Publishing
- Open an Approved post
- Click Publish Now
- The post is sent to all selected platforms immediately
- Status changes to Published and engagement tracking begins
Scheduled Publishing
- Open an Approved post
- Set the Scheduled Date field to the desired date and time
- Click Schedule
- The post status changes to Scheduled
- At the scheduled time, the system automatically publishes to all selected platforms
Publishing Results
After a post is published, the system tracks results per platform:
| Field | Description |
|---|---|
| Platform | Which social network |
| Post URL | Direct link to the published post |
| Published At | Exact timestamp of publication |
| Likes | Like/reaction count |
| Comments | Comment count |
| Shares | Share/repost count |
| Impressions | Number of times the post was displayed |
| Reach | Number of unique users who saw the post |
| Engagement Rate | (Likes + Comments + Shares) / Reach as a percentage |
Analytics Dashboard
The Analytics Dashboard provides a unified view of social media performance across all connected accounts.
Key Metrics
| Metric | Description |
|---|---|
| Followers | Total follower count across all platforms, with growth trends |
| Impressions | Total number of times content was displayed |
| Reach | Total unique users who saw content |
| Engagements | Total likes, comments, shares, and clicks |
| Engagement Rate | Overall engagement as a percentage of reach |
| Platform Comparison | Side-by-side performance of each connected platform |
 Analytics Dashboard — unified performance metrics across all connected platforms
Using Analytics
- Navigate to Social Media > Analytics
- Select the date range using the date picker
- View summary cards at the top for high-level metrics
- Scroll down for platform-by-platform breakdowns
- Use filters to narrow by account, platform, or content category
Unified Inbox
The Unified Inbox consolidates messages and comments from all connected social platforms into a single view.
| Feature | Description |
|---|---|
| All Messages | Comments, direct messages, and replies from every platform |
| Platform Icon | Each message shows which platform it came from |
| Reply | Respond directly from the inbox -- the reply is sent to the original platform |
| Mark as Read | Track which messages have been reviewed |
| Assign | Route messages to specific team members |
Navigate to Social Media > Inbox to access the unified inbox.
Advanced Features
A/B Testing
Create multiple content variations for the same post and compare performance:
- Open a post and click Create A/B Test
- Write two or more content variations
- Select the test audience and duration
- Publish -- the system tracks which variation performs best
Hashtag Analytics
Track hashtag performance across all posts:
- See which hashtags drive the most engagement
- View hashtag usage frequency and trends
- Identify top-performing hashtag combinations
Sentiment Analysis
The system analyzes comments and messages to detect sentiment:
- Positive, Neutral, and Negative sentiment labels
- Aggregated sentiment scores per post and per account
- Alerts for posts receiving negative sentiment spikes
Competitor Tracking
Monitor competitor social media activity:
- Add competitor accounts to track
- Compare follower growth, posting frequency, and engagement rates
- Identify content strategies that perform well in the industry
Content Recycling
Reuse high-performing content:
- Navigate to All Posts and sort by engagement
- Select a top-performing post
- Click Recycle to create a new draft based on the original content
- Edit and update for the new posting date
RSS Feed Integration
Automatically generate post drafts from RSS feeds:
- Go to Configuration > RSS Feeds
- Add a feed URL (industry news, company blog, etc.)
- Set the polling frequency
- New feed items create draft posts for review
UTM Builder
Add UTM tracking parameters to links in posts for campaign attribution:
| Parameter | Description |
|---|---|
| utm_source | The social platform (auto-filled) |
| utm_medium | Set to "social" by default |
| utm_campaign | The campaign name for this post or group of posts |
| utm_content | Optional -- used for A/B test differentiation |
Best Times to Post
The system analyzes historical engagement data to recommend optimal posting times:
- Recommendations are per-platform and per-account
- Based on when your audience is most active
- Updated weekly as new data comes in
Configuration
Platform API Setup
Each platform requires API credentials to be configured. Navigate to Social Media > Configuration > Platform Settings to manage connections.
| Platform | Requirements |
|---|---|
| Facebook / Instagram | Meta Business Suite App ID, App Secret, Page Access Token |
| X (Twitter) | API Key, API Secret, Access Token, Access Token Secret |
| Client ID, Client Secret, Organization ID | |
| YouTube | Google API Key, OAuth Client ID, OAuth Client Secret, Channel ID |
| TikTok | App ID, App Secret |
| App ID, App Secret | |
| Google Business Profile | Google API Key, OAuth Client ID, OAuth Client Secret, Location ID |
Store API credentials securely
API keys and secrets are stored in Odoo's system parameters. Only AI Administrators should have access to the platform configuration screens. Never share API credentials via email or chat.
Security Groups
Access to Social Media features is controlled by five security groups:
| Group | Permissions |
|---|---|
| Viewer | View published posts and analytics (read-only) |
| User | Create and edit draft posts, use AI generation, access Media Library |
| Approver | All User permissions plus approve or reject posts in the Approval Queue |
| Manager | All Approver permissions plus manage accounts, locations, and templates |
| Administrator | Full access including platform API configuration and security settings |
If you cannot see Social Media menu items, ask your manager to assign you the appropriate group.
Common Tasks
Connecting a New Account
- Go to Social Media > Configuration > Accounts
- Click New
- Select the platform
- Click Connect and complete the OAuth flow
- Verify the status shows Connected
- Optionally assign the account to a location
Creating and Publishing a Post
- Go to Social Media > All Posts > New
- Write content or use Generate with AI for a draft
- Add media from the Media Library or upload new files
- Select target accounts
- Choose a category
- Click Submit for Approval
- Once approved, set a scheduled date or click Publish Now
Submitting a Post for Approval
- Open a draft post
- Review content, media, and target accounts
- Click Submit for Approval
- The post appears in Social Media > Approval Queue for reviewers
Scheduling Posts
- Open an approved post
- Set the Scheduled Date field
- Click Schedule
- Verify the post appears on the Content Calendar at the correct date and time
Viewing Analytics
- Go to Social Media > Analytics
- Set the date range
- Review summary metrics (followers, reach, engagement)
- Scroll down for per-platform and per-post breakdowns
- Export data if needed for reporting
Tips
Always review AI-generated content before approving
AI content generation produces solid first drafts, but every post should be reviewed for accuracy, brand voice, and platform-specific formatting before approval.
Check analytics weekly
Set a recurring time each week to review the Analytics Dashboard. Look for trends in engagement rate, follower growth, and which content categories perform best. Use these insights to guide your content strategy.
Use the calendar to space out content
Open the Content Calendar before scheduling new posts. Avoid clustering multiple posts on the same day -- spread content evenly across the week for better reach.
Respond to inbox messages promptly
The Unified Inbox collects messages from all platforms. Check it daily and respond within 24 hours. Fast response times improve customer perception and platform algorithm rankings.
Leverage best times to post
Check the Best Times to Post recommendations before scheduling. Publishing when your audience is most active significantly increases reach and engagement.
Questions? Contact your supervisor or refer to the AI & Automation overview.